Your Twitch stream key lives in Twitch Creator Dashboard under Settings, then Stream, then Primary Stream key. Treat it like a password: anyone with the key can send video to your channel until you reset it.
For a professional broadcast, the stream key is only one part of the setup. You also need the Twitch RTMP or RTMPS endpoint, a stable production workflow, a way to test before the real event, and a plan for what happens after the Twitch stream ends. That is where a tool like HeyStream fits: Twitch can be one destination, while your registration, branded viewing experience, CTAs, replay, audience intelligence, and follow-up stay in a workflow built for B2B and community broadcasts.
This guide explains what the Twitch stream key does, how the Twitch RTMP setup works, how to connect Twitch in HeyStream, and when Twitch is the right destination for developer sessions, product launches, community education, or open technical broadcasts.
Quick Answer: Finding Your Twitch Stream Key
In Twitch, open Creator Dashboard, go to Settings, choose Stream, and copy the Primary Stream key. Paste that key into the streaming tool that will send the broadcast to Twitch.
Twitch's Stream Key FAQ treats the stream key as the credential for your channel's broadcast, so do not paste it into shared docs, screenshots, Slack threads, or public runbooks. If a key is exposed, reset it before the next live session.
For a team workflow, use this simple rule: the producer responsible for the broadcast can access the key, but presenters, guests, marketers, and sales teammates should not need to see it. They need the event plan, the run of show, the CTA, and the follow-up context, not the credential that can put video on the channel.
What the Twitch Stream Key, RTMP URL, and Ingest Server Mean
Twitch receives live video over RTMP. Twitch's Video Broadcast docs describe a broadcast as entering Twitch through RTMP, reaching an ingest server, and being authorized by a stream key.
Here is the plain-English version.
| Twitch setup item | What it does | Where it comes from | Where it goes in HeyStream |
|---|---|---|---|
| Stream key | Authorizes your Twitch channel to receive the live stream | Twitch Creator Dashboard | The Stream key field for the Twitch destination |
| RTMP or RTMPS endpoint | Tells your streaming tool where to send the video | Twitch or the destination preset | HeyStream's Twitch destination uses the default Twitch RTMPS endpoint |
| Ingest server | The Twitch entry point that receives the stream | Twitch infrastructure | Usually handled by the default endpoint unless you have a specific reason to customize |
| Test stream | Lets you check stability before the real broadcast | Twitch Inspector and your production workflow | Run before the live event, not during the first real minute |
HeyStream's Twitch destination uses the default endpoint rtmps://live.twitch.tv/app, so in most cases your setup job is to add Twitch, paste the stream key, validate the destination, and make sure the event itself is ready.
How to Add Twitch as a HeyStream Destination
Start in HeyStream by adding Twitch as a streaming destination. Give the destination a recognizable name, paste the Twitch stream key, and keep the default Twitch RTMPS endpoint unless your team has a specific current reason to use another Twitch ingest route.
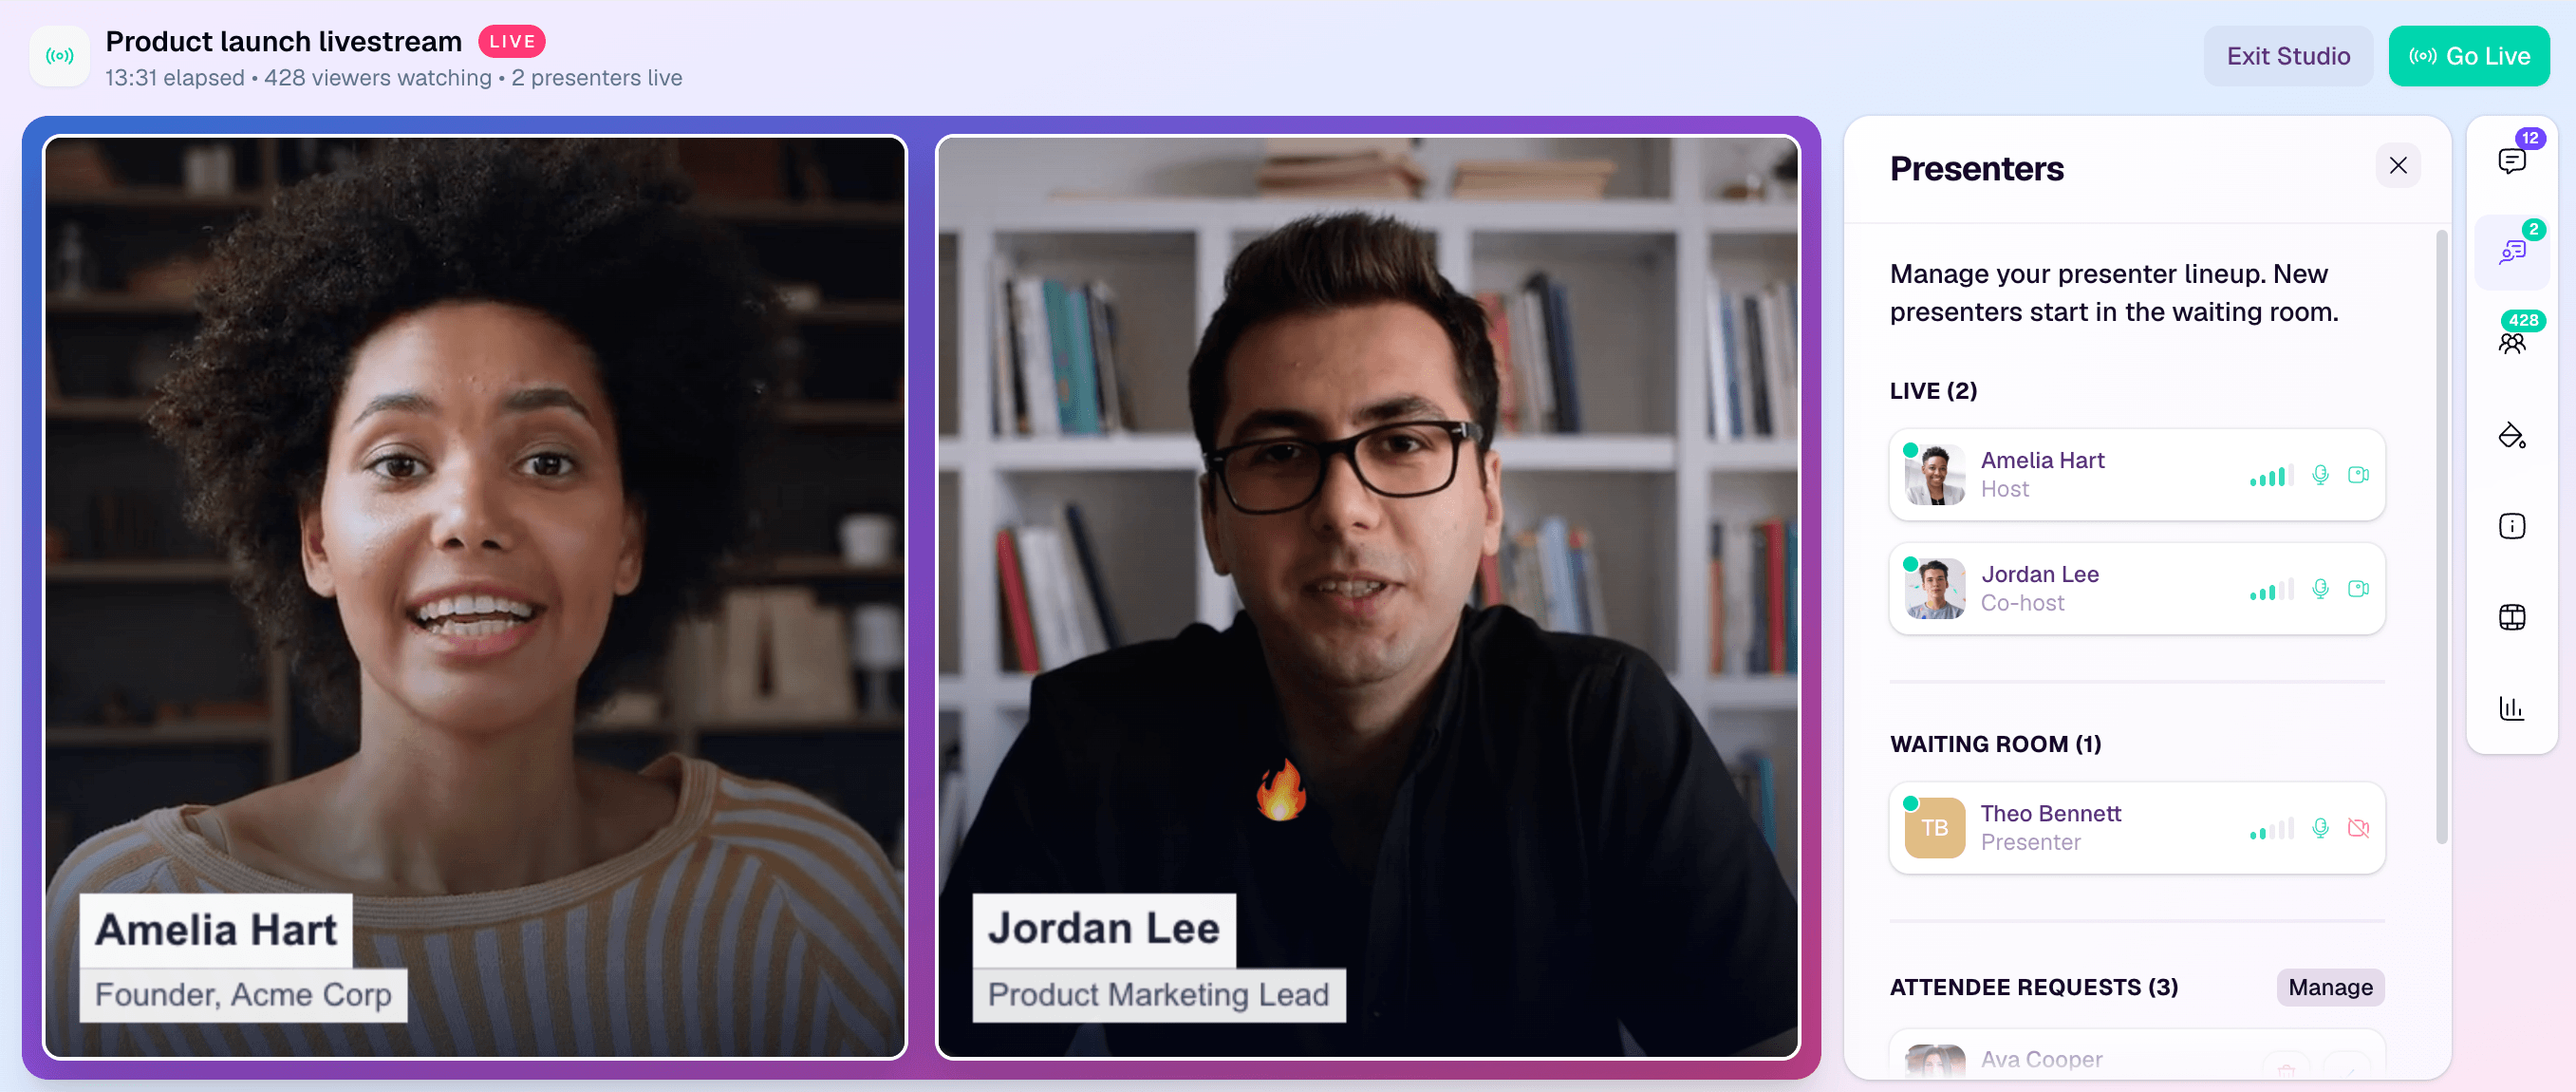
Before you save the destination for a higher-stakes broadcast, send a short test stream. This catches wrong keys, stale keys, account readiness issues, and network problems while there is still time to fix them.
A reliable setup usually looks like this:
- Confirm the Twitch channel, event owner, title, category, and moderation plan.
- Copy the current Primary Stream key from Twitch.
- Add or edit the Twitch destination in HeyStream.
- Paste the key and use the default Twitch RTMPS endpoint.
- Run a validation or test stream.
- Confirm the stream health before adding Twitch to the real broadcast plan.
That keeps Twitch setup from becoming a last-minute production task.
Twitch Stream Settings to Check Before a Professional Broadcast
For a professional session, do not choose stream settings from memory or from an old checklist. Before the event, check Twitch's current Broadcasting Guidelines for bitrate, resolution, frame-rate, encoder, audio, and keyframe guidance.
Use the guidance as a pre-flight checklist rather than a promise that one universal setting fits every event. A developer workshop with slides, a live product demo, and multiple presenters may need different production choices from a casual creator stream.
At minimum, confirm:
- The upload connection has enough headroom for the chosen bitrate.
- The encoder output is stable for the full planned duration.
- Audio stays clear when presenters, screen share, and media clips are active.
- The category, title, thumbnail or preview details, and moderation plan are ready before the audience arrives.
- The team knows where viewers should go next after watching on Twitch.
If your goal is lead capture, replay engagement, or sales follow-up, Twitch should not be the only place where the broadcast exists. Use Twitch for reach or community presence, then keep the owned registration, CTA, replay, and audience record in HeyStream.
How to Test Without Risking the Real Event
A Twitch test should answer two questions: can the stream connect, and does it stay healthy long enough to trust it during the real event?
Use Twitch Inspector to review stream health, bitrate stability, encoder details, and test-stream results. Twitch Inspector also supports a test workflow using the ?bandwidthtest=true flag, which Twitch's developer docs describe as a way to check bandwidth health without making the stream viewable live.
For most teams, the safest routine is:
- Run a short HeyStream destination validation or private rehearsal.
- Check Twitch Inspector for connection and stability signals.
- Confirm that Twitch title, category, and moderation settings are ready.
- Confirm that the HeyStream event page, CTAs, replay path, and follow-up automation are ready too.
Do not make the first connection test at the scheduled start time. That is how a small stream-key typo becomes a public production problem.
When Twitch Makes Sense for a B2B or Community Broadcast
Twitch can be useful when your audience already spends time there, or when the format benefits from an open community destination. Good examples include developer relations sessions, technical education, product launch watch parties, open workshops, creator-partner events, and community-led broadcasts.
Twitch is less likely to be the right primary destination when the event depends on private registration, qualified attendance, controlled viewing, sales follow-up, or account-level reporting. In those cases, treat Twitch as an additional distribution endpoint, not the center of the webinar strategy.
| Use Twitch when | Be careful when |
|---|---|
| Your community already watches technical or live content there | Your primary goal is private registration or sales qualification |
| The event is open, educational, or community-led | You need a controlled attendee experience for every viewer |
| You want a public destination alongside your owned event page | You have no moderation owner for chat and community behavior |
| You can connect Twitch viewers back to CTAs, replay, and follow-up | You are relying on Twitch alone to identify audience intent |
The strongest professional setup is usually a both-and model: Twitch for destination reach, HeyStream for the branded event workflow around it.
What to Do After the Twitch Broadcast
The post-event workflow matters as much as the stream connection.
After the broadcast, review who registered, who watched live, who returned for the replay, who clicked a CTA, and which topics created the clearest audience signals. HeyStream's audience intelligence helps turn those actions into audience records instead of leaving the team with only a public stream and a chat log.
Then connect the next step. If the broadcast included a demo, workshop, or launch moment, use live and replay CTAs to point viewers toward the right action. If the team needs segmented outreach, use webinar follow-up automation to separate live attendees, replay viewers, CTA clickers, and no-shows.
That is the difference between simply streaming to Twitch and running a professional broadcast program that can be measured and improved.
Troubleshooting Twitch RTMP Setup
If the stream does not connect, start with the boring checks first. They fix most failures.
- Re-copy the stream key from Twitch and make sure no spaces were added.
- Confirm the key was not reset after a password, account, or security change.
- Confirm the Twitch destination is using the intended endpoint.
- Re-run a short test before the live event.
- Check Twitch Inspector for bitrate stability, encoder details, and ingest information.
- Confirm that the channel is allowed to stream and that the title, category, and moderation plan are ready.
For broader RTMP troubleshooting, keep the generic Custom RTMP setup guide nearby. If your team is comparing social destinations, the same cluster also covers YouTube Live RTMP setup, Facebook Live RTMP setup, and LinkedIn Live RTMP setup. LinkedIn is often the more natural B2B-native destination, while Twitch is strongest when the community or technical audience is already there.
The Practical Takeaway
A Twitch stream key is simple to paste and easy to mishandle. Protect it, test it, and treat Twitch as one destination in a wider event workflow.
For B2B and community teams, the goal is not just getting video onto Twitch. The goal is running a broadcast that looks polished, reaches the right audience, captures the next step, supports replay, and gives the team enough audience context to follow up intelligently.
HeyStream's browser-based streaming studio gives teams a production layer for that workflow, with Twitch as a destination rather than the whole strategy.